Oil changes, we all do them, and sometimes it's messy. The ADV150 has a 4000 mile oil change interval after the initial 600 mile change. When I did the first oil change on the scooter I discovered that the location of the oil drain plug is close to the center stand. My drain pan has to be just right to avoid some spillage. I decided to re-visit my research for quick oil change valves. These have been around for probably as long as engines, but technology progresses and I poked the internet to see what was out there for the correct size of the ADV150 scooter. I had used them in the past on motorcycles, but wasn't impressed with the previous ones I had used. No protection for the valve, which concerned me with the low clearance of the scooter and it's adventurous nature. 😇
I found many options, from a simple valve threaded in to the drain hole that had no protection, to industrial solutions that might have been as time consuming as the standard drain plug. What I settled on for the ADV150 was the Stahlbus Oil Drain Valve. This slick device is precision made in Germany, offered in the correct size, (M12 x 1.5), and includes a protective cap as well. I found them for $45 on Amazon, Part Number SB-210111-S-NA.
The Stahlbus design fits well on the scooter. It's a little tricky to tighten w/o a thin wall socket, but can be done with an open end wrench. The threaded portion is shorter than the threads in the engine, so you get a full drain by opening the valve with the included mating part. It comes with a protective cap that has an o-ring, so it securely threads in place and doesn't come off with vibration.
You get the valve that threads into the engine, a protective cap for when you're using the scooter and a quick insert drain connector with a length of flexible tubing to attach to it. The tubing was much longer than I needed for the scooter, so I trimmed off a piece the right size to drain into my oil pan with the scooter on the center stand.
Inside the box:
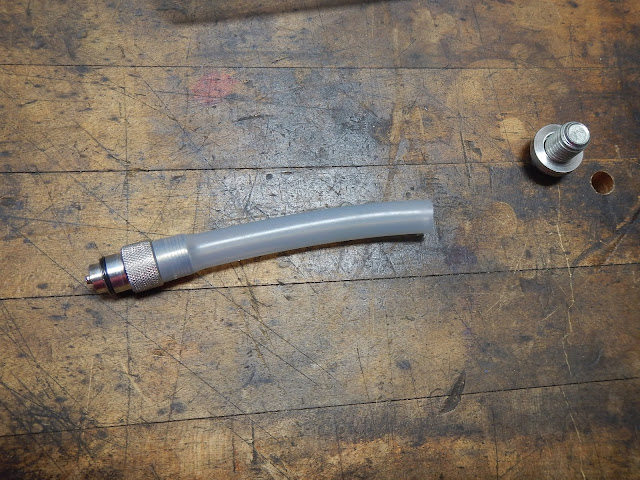
The drain attachment with tube installed and the OEM drain plug:
Installation is as simple as removing your drain plug, draining the old oil, cleaning the drain area, then screwing in the new Stahlbus valve and tightening it to the recommended torque value of 18 ft/lbs. That's just the normal torque for a drain plug, not super tight. Easy to do with a hand tool.
Here is the Stahlbus valve installed. You can clearly see the spring loaded stainless steel check ball inside.
Here is with the protective cap installed.
The drain connector just presses in and has a bayonet twist, at which point it begins draining, so make sure you have the drain pan under the hose when you insert it! The cap is not difficult to get off after 4000 miles of scootering all over and the Stahlbus quick change oil valve makes for a super clean and easy oil change. I was pleased enough with the quality and super easy install and use that I bought a second one for my wife's ADV150 as well.
At the 8k oil change interval, the protective cap is still in place and was easily removed. The oil change was a simple matter of removing the protective cap, lining up the oil pan, an easy push of the drain connector, which snapped easily in place and the oil flowed out. I like to remove the oil fill cap first to allow smooth oil flow. Once the oil was finished draining, a smooth 1/4 turn twist of the drain connector and it came right off w/o any mess. Re-install the protective cap and on to clean the oil screen before filling with 0.8L of fresh oil. Wow, what a quick and easy process.
Oil changes still require removal and cleaning of the oil screens on the side of the engine, but since no oil runs out when doing this, (after draining the oil, naturally!), it's a nice clean process now. I'm very pleased with this somewhat boring upgrade to the scooters. 😁


